
In 2018, a Shopify forum member asked a simple question:
"Size and Color Filter: Is it really true that this (seemingly simple, and very important) feature is NOT a part of Shopify as a basic part of the build?"
To which Ann from Shopify responded:
"You're right, at this time, a filter like this isn't something that is built into the native Shopify platform."
The Shopify staff member then suggested the use of an app to which the forum member wasn't happy about.
Indeed, you too might be wondering why an app is required to filter by something as simple as size and colour.
Well, in order to filter a product (or variant) by a certain attribute in Shopify, we need a way of storing that attribute on the product (or variant) object.
As you'll read in this article however, we can utilise the power of tags in Shopify to achieve this aim of filtering by attributes like size and colour without the use of an app.
It all starts with how we set up our product organisation.
Product Organisation in Shopify
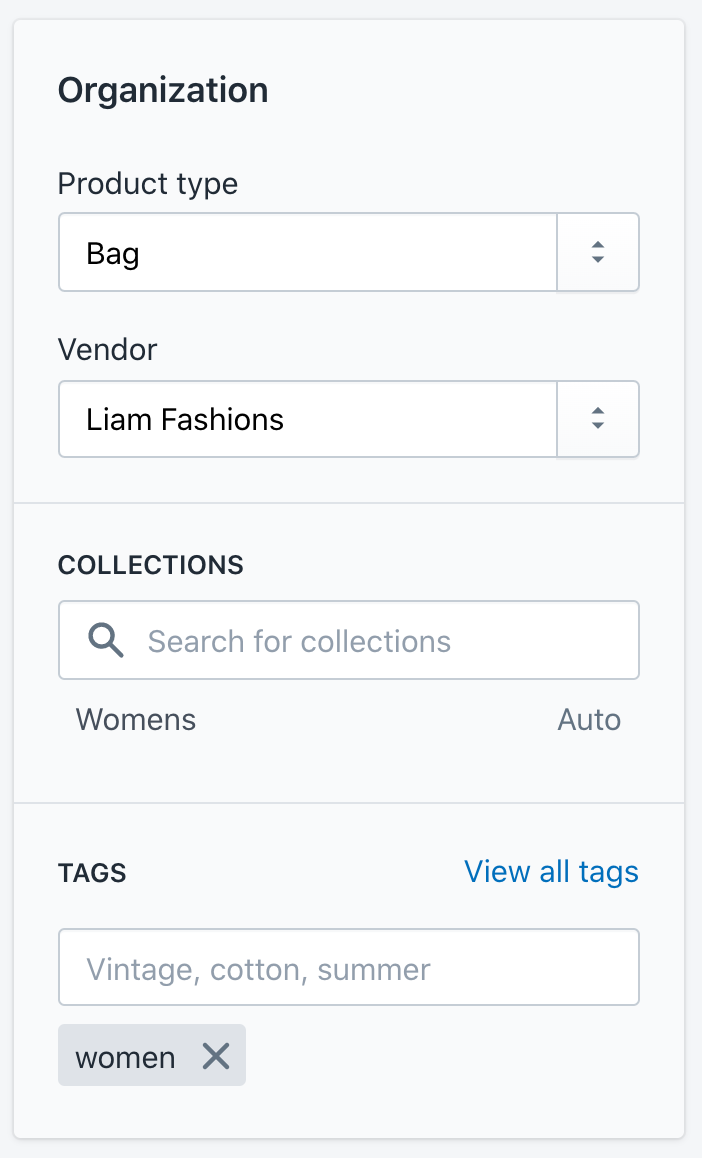
Shopify provides just 4 ways to organise your products which are type, vendor, collections and tags.
Each product can only have one type and one vendor but can have multiple tags and be a part of multiple collections.
Collections are the primary way that the Shopify platform encourages you to organise your products. These can be populated manually (by selecting the specific product you want to be included) or automatically based on certain conditions.
Collections need to be set up in the Shopify admin before a product can be added to them, which in turn automatically produces a collection page on your Shopify website for that collection.
Tags on the other hand are much more fluid. They aren't objects in and of themselves like collections and can be thought of more as labels that you can throw on products.
Using tags, you can create automatic collections (based on the tags) and filter products within a collection by adding url parameters after the collection address (we'll look at this in just a second).
The other two, type and vendor operate virtually the same and are used primarily for display only.
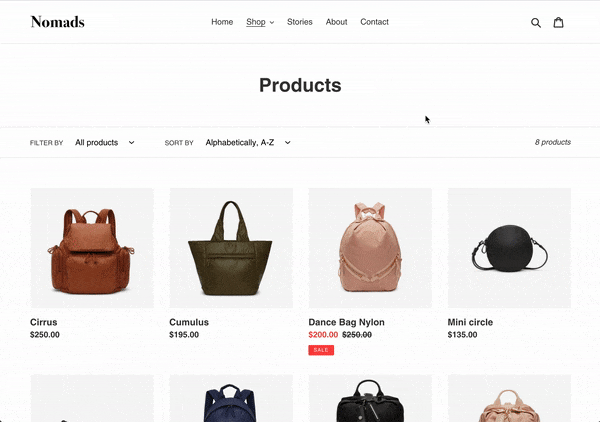
Standard collection filtering in Shopify
Now that you've organised your products by the collections, tags, types and vendor, we can now filter a collection view by adding url parameters.
Using the example above (in the screenshot), we can start by looking at the specific collection (in this case, the womens collection) by appending /collections/womens to the end of our url.
We can then filter down further via tags by adding a slash (/) followed by the list of tags separated by a plus (+).
For example, if we had products tagged with red and slim in the womens collection, we could filter that collection view using the following url structure
/collections/womens/red+slim
Using this url structure, the collection template (which renders all collection pages) automatically removes all products from the view that do not carry the list of tags specified.
The collection template also has a special variable called current_tags which provides the the list of tags currently applied as well as link_to_add_tag and link_to_remove_tag which automatically take the current list of tags in the url and add to / remove from it.
To see this action, check out the demo for Shopify's standard Debut theme.
In the above animated gif, you can see there is a simple dropdown containing all of the tags that exist on the products within the 'All' collection. When the user makes a selection, that tag is then applied to the url (not shown) and the collection page is refreshed, showing only the products that are tagged with that particular tag.
The problem with this simple example however, is that the tags represent different attributes. There are tags for product dimensions ( 11", 13", 15" ), there are tags for colours ( "black") and there are tags for other attributes like "Convertible" and "Crossbody".
What could make for a much nicer user experience might be to separate those tags out into groups so that we can select a size and colour separately.
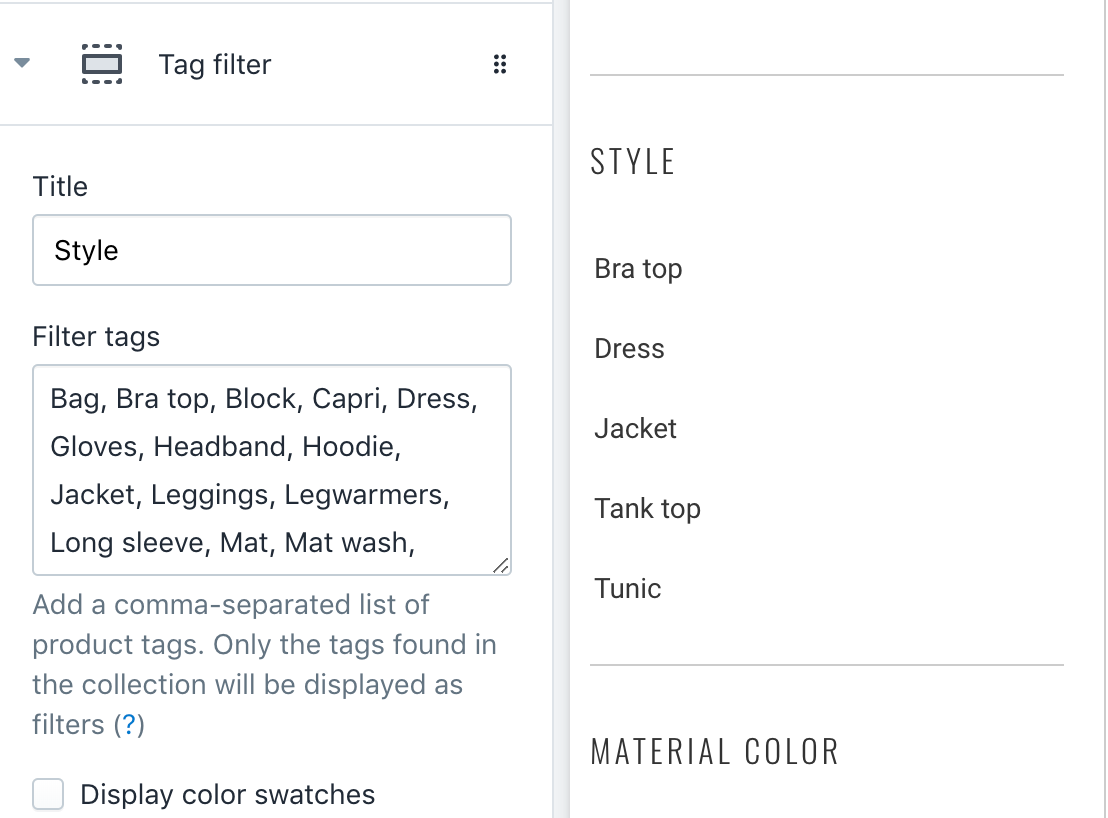
Grouping tags together
Certain themes (such as Turbo) have a feature built-in to create tag groups via the theme customiser.
This is one possibility that can be built into any theme but there are a few considerations.
- All tags must be unique to a particular attribute. For example, if you had two colour groups (perhaps one for fill and one for trim) and red was a possibility for both.
- When adding a new tag, a second step is required to add it to a group.
Instead, what could be a better approach is to prefix the tag with the attribute that it belongs too. So...
| red | becomes... | colour:red |
| large | becomes... | size:large |
| mat wash | becomes... | style:mat wash |
The warning with this approach is that you'll no longer be able to output tags verbatim to the front-end anymore (unless of course you don't mind the prefix being shown to the end user).
The prefix is not intended to be seen. It just provides the ability for the theme developer to group tags with the same attribute together.
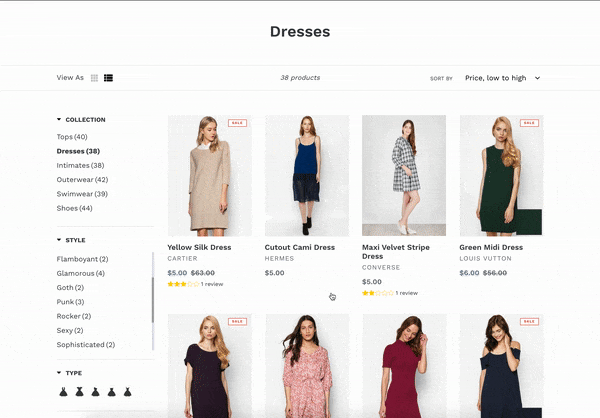
Regardless of which grouping approach you take, the end result becomes something like this:

Advanced collection filtering
Tags are of course, the recommended approach to filtering in Shopify but you might be curious as to what else we could use to filter results.
Theoretically, we could target (and therefore filter via) any attribute on the product object and nested variant objects.
The full list of attributes for the product and variant objects are listed on Shopify's Liquid reference however I would warn against getting too tricky here.
For requirements like filtering by size and colour, we can easily use tags and build a simple prefix reader into the theme code. That way we take advantage of the inherent filtering abilities of tags.
Using more complex Liquid code, we could create filters based on other attributes like vendor, product type or even price. The issue is that without the use of the url parameters, how will the collection template know when and what to filter?
The alternative here is to use Javascript.
In fact, most filtering apps you'll find on the Shopify app store use Javascript (not Liquid) to operate.
Utilising Javascript (instead of Liquid) provides two benefits:
- AJAX filtering - meaning no page refresh when updating filters, and
- The possibility to accept user input without relying on URL parameters
In fact, Javascript is near infinite in its capabilities compared with Shopify Liquid which has been built to be simple and work in a certain way.
The problem with using Javascript however is that it doesn't have direct access to theme/store data like Shopify Liquid does.
This is where it starts to get tricky.
Javascript filtering
If Shopify Liquid is too limiting you might opt for a Javascript filtering solution.
Javascript filtering is not a standard feature of Shopify themes and therefore, it will require development to both access the necessary data, accept user input and then apply that input to filtering the collection of products.
In terms of accessing data, the simplest way of exposing the necessary product data to the front-end (so that Javascript can use it) is by using the JSON filter in Shopify Liquid, which will take any Shopify object and turn it into a JSON one.
You can then load the JSON object for each product into a Javascript array and use that as your product list.
After that, you'll of course need to set up event listeners to run the filters on your array of products and update the page.
As you might have noticed, this is much more laborious compared to using the standard Shopify filtering system.
This is why it's very common to use an app.
An app like Product Filter & Search by BoostCommerce provides all of this functionality without having to write any Javascript code.
If you take a look under the hood, you'll see that there is a lot going on with this app.
Each time a selection is made, an API request is shot off to an external server which returns the new array of products.
Note the words "external server".
The filtering is no longer happening on the actual Shopify store. Instead, the data is "synced" to an API and a user interface is built into the theme in order to interact with this API.
This is not necessarily a problem until you wish to heavily customise the collection page but regardless, it involves a heavy abstraction away from the Shopify platform itself.
General Recommendations
When it comes to filtering collections in Shopify, my recommendation is to simply use tags.
Using tags is the native way to filter products and as you've seen in this article, we can expand our tag names with prefixes, allowing us to group together filtering options by attribute.
Of course, if you need something a little more fancy, you can go with an app but this will complicate things.
I've experienced first-hand the drama of adding custom features to a collection page managed by an app.
So if you can get away without using app, I'd definitely recommend doing so.
Do you run a Shopify store? What solution are you currently running to filter products? Let me know your thoughts on using standard filtering over an app (or vice versa)
Remember, if you need any help with your Shopify theme development needs, send me a message on LinkedIn and let's chat about it!
Until next time,
Chris